

So you’re thinking of integrating video into your business? Good! There is arguably no form of marketing as powerful as video for building brand awareness, converting leads and keeping customers loyal. And the customer testimonial video is easily one the best video methods of increasing sales and driving traffic to your store.
But starting with video can be a daunting experience for someone without much experience working with the format.
In this three-part blog post I will take you through all the steps needed to shoot a powerful testimonial video, as well as throw in some pro tips for those of you feeling a bit more adventurous.
The focus will mainly be how to approach your shoots, but I’ll throw in some technical advice too.
Remember, shooting video maybe scary at first but stick to these tips and it’ll be a fun (but challenging) ride.
Equipment
Breaking my bank balance every month, buying film equipment can be addictive and costly. As well as your main gear there are all sorts of great toys that can really add flare to your productions. While drone cameras, sliders and fisheye lenses maybe a lot of fun, for the purpose of this piece we will just focus on the basics, your camera, tripod, lights and audio gear.
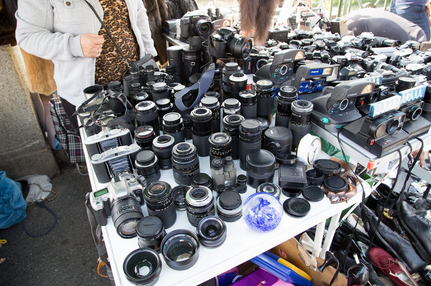
Cameras
Obviously without a camera your testimonial video shoot is going to be a bit of a fail. But with thousands of options on the market, where do you start?
For those nervous about filming, your smartphone maybe a decent first option — just make sure you buy (and use) a tripod for it, as shaky footage from a phone will look amatuer and won’t present your business in the best light. Do some research into tripod options — eBay and Amazon are good places to start. Any mid to high-end smartphone of the last few years offers a great place for beginners to start out.
Another option is to invest in a camcorder or a DSLR/mirrorless camera. A lot of camcorder’s are very user friendly with good automatic modes. It is beyond the scope of this piece of writing to explore which options are good - again do your research. Looking at top camcorder lists for the current and last year and going from there is a good place to begin. Looking at YouTube for “[insert camera name here] footage” is a good tactic too, to compare and contrast different contenders.
For the adventurous or for those of you looking for the best option, I’d recommend picking up a DSLR or mirrorless camera that has a good video recording mode. Canon have made a lot of great DSLR options, including the 550D at more of a budget level and the 5D at the higher end. The main advantage of using a DSLR is the fact that you can change lenses, opening up a huge amount of creative possibilities.

For those of you looking to splash out and who want some uptodate tech, look no further than the Panasonic GH4 and Sony A7s. Both are incredible pieces of kit, but, again, expect to break the bank for their bodies along with a few lenses.
Sound
Something I’ve heard a lot from film-makers that’s really worth taking note of is that bad picture can be a stylistic choice, but bad sound is always just bad sound. While we process sound on a more subconscious level than we do the images of a film, there is nothing that pulls you out of a video more than shoddy audio.
With this in mind people who have opted for filming on a smart-phone take note - it is imperative that you invest in a good audio recording set-up. Your phone may shoot good pictures but I assure you, the audio recordings from it will not be adequate for the job at hand.
So what high end options do you have? Let’s just focus on one tried and tested method for this piece. I’d recommend an audio recorder (I use a H4n) in combination with a Lav Mic, aka a Clip-On microphone. While using an audio recorder takes a bit of practise (hint: there’s loads of tutorials on Youtube) you only need to master the basics, which won’t take long. Simply plug your lav mic into your audio recorder, connect to your subject and make sure your levels are good.

A decent lav mic is the RODE lav mic+. If you have a spare smartphone you can plug this particular microphone into and capture audio through an app. I use it with my H4n - however if you’re planning on using with an audio recorder like I do, you’ll need an additional piece of equipment to connect it (a TRRS to TRS adaptor).
While there other options (shotgun mic., or a directional attached to a boom pole) this method is relatively easy to pick up and will net you great results once mastered.
Lights
Alright, so that’s two items off our list, now for the last one: lighting.
Now of course, you can shoot your testimonials without fancy lights if you’re new to the world of video. Just make sure you’re in a well-lit room or space - arrange your subject so any strong lighting isn’t directly behind them (this will blow out the image) or directly in front of them (this will make them squint and look funny). If possible strong light hitting one side of the face gives a nice effect.
But really, lighting isn’t too hard to get the basics down and the effect it will have on your videos easily outweighs the expense and learning curve.
If you take a look on eBay there are endless listing for three point lighting kits. I recommend buying one that use the daylight energy saving light bulbs, as they give a lovely, even white light.
Setting them up is simple. To begin just try setting up two lights on each side of your subject. You can experiment with putting less bulbs in one side or moving a light further back to get a bit of contrast on each side of your subject’s face. Once you’ve mastered this, throw in a light behind your subject, so they’re masking it. The effect is subtle but powerful, making them pop from the background.
Feeling overwhelmed? Don’t worry! Before you start thinking about shooting testimonial videos, do your research, pick your equipment and then shoot a mock video (or two), in your office or with friends. This may sound or even feel stupid. But you will learn so much in the process.
If shooting a mock testimonial isn’t your thing, why not an over-view of your business? If it goes well, you’ve got an extra vid for your site. If it doesn’t, no bother, you’ll have learnt a lot!
A blogpost like this can point you in the right direction, but the only way to learn is to get down and dirty with your subject and your equipment.
So practise, shoot some mock videos (also check Part 3 of this blog which covers the edit) and once you’re ready, we’ll move onto shooting an actual testimonial video.
Jamie Panton graduated last year with a First Class Honors in Film and Television Production. He now works at Veeqo, producers of Inventory Management software, where he shoots their video content. In his spare-time he runs his own film-making business. On the rare instances he’s not working on films, he’s thinking about them.